A shooting platform that is portable, allows for 360 degree motion, yet sturdy and comfortable enough to sit on for hours while shooting varmints?

The Idleback Shooting Chair
That’s the thought that went through my head as I wandered by the Idleback booth at the 2014 SHOT Show last January. My first glance of the chair lit up more than a few light bulbs in my brain, as I thought about all the ways I (or any varmint hunter) could utilize such a device! It was like looking at the Swiss Army Knife of shooting benches.
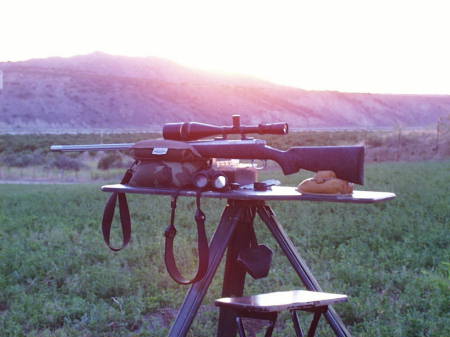
My Original Shooting Bench – Circa Early 1990’s
My history of shooting rests is long and varied. Back in the early 1990’s, I went from Harris bi-pods and home-made shooting sticks, to my first foray into an actual shooting bench. It was a custom made bench that I purchased from a man who advertised in one of the first “Varmint Hunter” magazines. For the time, it was very advanced and portable. However, set-up and break-down normally took about 10 to 15 minutes and it was not very versatile while shooting out in the field. Although the top can move 360 degrees, you only had a certain degree of motion before you had to stand-up and move your chair, which sat separate on the ground. When shooting wary varmints, any bit of movement sends them back into their holes, so although it worked well while shooting from a stationary spot, the bench’s limits were evident whenever you needed to adjust. Needless to say, I kept looking for a better solution, trying many variants over the years which proved either very portable, but not sturdy, or sturdy, but not portable at all.
Now that you have a bit of history behind my search, let’s go back to the 2014 SHOT Show and my visit to the Idleback booth. The folks at Idleback had one of their chairs set-up for attendees to try out right, so I took a long look at the set-up. The base was a mini-version of my original bench, with a lightweight, collapsible, tripod that the entire top system “plugged” into. The attached seat and rifle rest have full 360 degree motion, which allows the shooter to move quietly, in a full circle, with little effort. The seat that is attached to the legs, consists of a padded chair that has a sturdy back (also padded), which folds down allowing the shooter to step on and off of the chair easily. The entire package folds down into a portable unit, that can be slung over your shoulder with the included strap and moved anywhere you want. The thing I liked the best, was the fact that you did not have to take this chair apart to move it. A few turns of some knobs and it folds up into a size that is manageable by anyone.
After studying the chair for a few minutes, it became available for me to hop on and take it for a test spin. Getting on was easy enough, but figuring out where to hold my hands and arms while tucking myself behind the mock rifle took a few moments to get used to, but once I got adjusted, it was evident I was over-thinking it and tucked my hand into my regular shooting position. Motion was smooth, and as advertised, you could move a full 360 degrees with hardly any effort. As I tucked my cheek onto the mock rifle on the rest, I also found that moving slightly, in either direction, in order to track your target, was a dream. My next question was simple, “Can I get one to try out in the field?”.

A couple of months after SHOT, I received a phone call from Steve at Idleback’s USA location. He was sending me a chair to test out and it would arrive within a day! When I received the package, I opened everything up and followed the instructions to set it up in my backyard. Everything was packaged well and the instructions were spelled out clearly, with accompanying photos making set-up a snap.
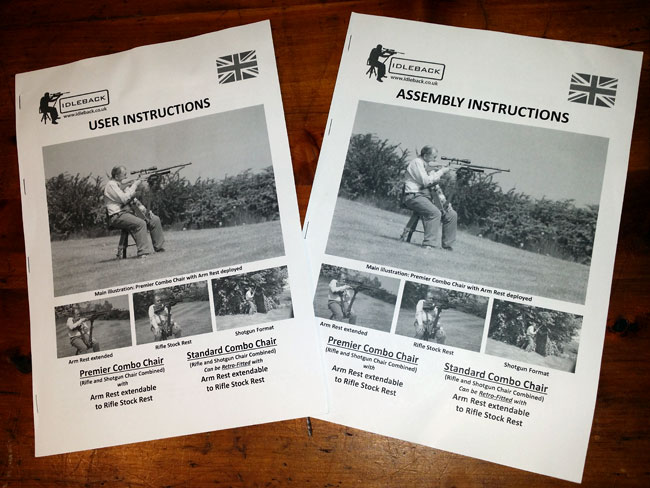
Idleback’s Instruction Booklets
My first thought was how well this chair was made. It was obvious by just looking at the powder-coated aluminum pieces and perfect fitting parts, that this shooting chair was not made in China. The folks in England, who designed and manufacture these chairs, are very thorough. The metal legs are height adjustable, yet sturdy enough to keep the chair solid when you plant the feet into the earth. The moving parts were smooth, with holes lining up like they are supposed to, and the parts went together flawlessly. (I know some readers are wondering why I am getting so detailed about the workmanship. I want to make it clear that after working with many frustrating benches, with no directions, missing parts, or poor fitting pieces, the Idleback Chair’s high-quality workmanship was a refreshing change).


Because I was leaving in two days for a ground squirrel hunt up in NE California, I spent some time getting used to the functionality of the Idleback Chair and learning how to fold it up into a portable package. Although it looked daunting once it was set-up, it took me no time at all to get it figured out and bagged up ready for my hunt. As I packed for my Northeast California hunt trip, I loaded up both my original shooting bench and the Idleback Chair. I figured that I would spend some time with my old bench, in a stationary spot, then transfer everything over to the Idleback for more of a portable option. I did not know what situation I would be in, but I knew it would get plenty of field time.
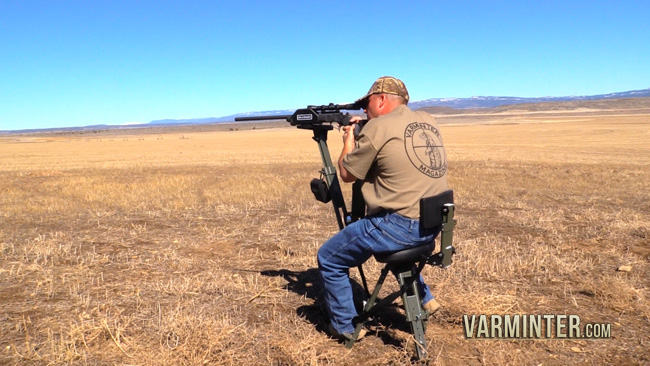
Shooting in NE California on the Idleback Chair
The day before our hunt, the area had received a slight dusting of snow, along with a decent amount of rain. This meant muddy and wet conditions, with a brisk wind coming from the East. I spent the morning shooting from my original bench, with most of my shots being within 250 yards. Once things warmed up a bit, the numbers of squirrels in front of me were dwindling, so I made a move to another area of the pivot. I packed up my bench and moved to an area that allowed me to shoot the pivot I shot in the morning, as well as a major portion of another area that had been untouched by any shooters the entire time I was there. I broke out the Idleback and had it set-up within a couple of minutes. I hung my rangefinder on one of the knobs and put my 17 Hornady Hornet ammo in the space on the bench in front of the seat (it fit perfectly). I hopped on and placed my CZ Model 527 Varmint on the rest and got ready for the action to start. The hours passed quickly, with shots ranging from 40 yards in front of me, out to 220 yards. The Idleback allowed me to not only shoot the squirrels in front of me, but ones that were popping up everywhere around me that I would have missed out on with my other bench. As the late afternoon came, I picked-up the chair and walked to another area about 75 yards away. I was carrying my rifle with scope, ammo and rangefinder, as well as the Idleback, which I had slung over my shoulder. I walked far enough away from the dirt road to allow me some uninterrupted, fast and furious shooting as the daylight hours waned. I had experienced some good shooting earlier, but this location had targets popping up every few seconds, so my number of kills began to rack up quickly!
One minute I was shooting in front of me, the next minute I was shooting 180 degrees behind me, or 90 degrees to my left and right. One target showed up on the only pile of rocks in the area. It was a fat squirrel that climbed up on top of one of the boulders about 100 yards away to soak in the last warm rays of the day. Without hesitation, I slowly spun the chair about 120 degrees to my left to get lined up for the shot. The squirrel didn’t even take a second look in my direction as I made my move. Too bad for him, as his next move was about 5 feet up into the air as the 20 grain bullet going 3650fps hit him. After the shot, I spun back around to my original position and continued making shots. It worked out perfectly!
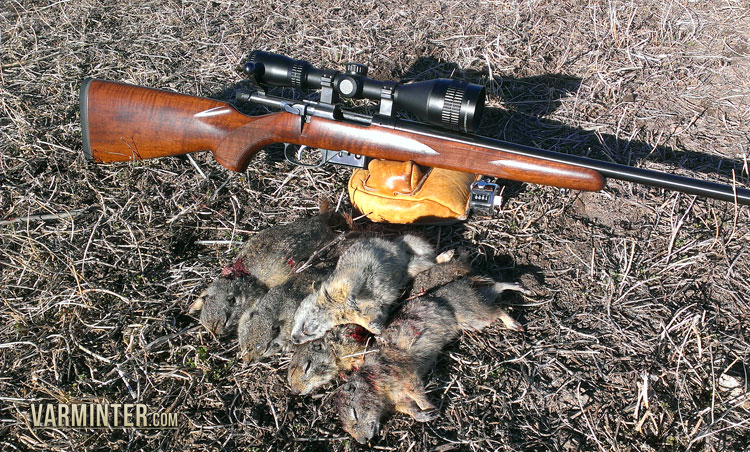
CZ Model 527 Varmint with some Ground Squirrels
The next day, my cameraman Tom and I headed to the opposite side of the pivot, hoping to shoot some of the ground squirrels that eluded us a day earlier. I could see the squirrels from my previous shooting location, but they were behind the actual irrigation pivot, so they were off-limits. From this side, we had hoards of ground squirrels to shoot, in almost every direction, so the Idleback was perfect. I spent most of that day moving back and forth shooting squirrels in every direction. It was the most comfortable shoot I had, as I did not have to hunch over a low bench, while sitting on a bucket or hard plastic seat. As you will see in the video below, my lighter rifle could sit on the rest of the Idleback (unloaded, of course) without me holding it. The “arm” that is the back rest is adjustable to fit either under your rifle’s buttstock, or a bit lower so you can rest your non-shooting hand on it for added comfort. The back also made for a nice rest when sitting up glassing for targets with my binoculars. After we filmed for a few hours, I let my cameraman use my old shooting bench while I continued to shoot off the Idleback.
After my NE California hunt, I headed back to SoCal to hunt some of the orchards I frequent. This is where I knew the Idleback would shine. For those who have read some of my past articles, I tend to hunt the orchards by actually getting into the trees, setting up for an extended time in one spot. Up until now, I would have a difficult time covering the intersection of more than two rows due to the inability to adjust quietly. When you have many targets that are within 40 yards of you, there is no way you can stand up to move your seat for a shot. You would get blasted with a loud warning “chirp” when the ground squirrel spots you and that would be it for that area.
My old orchard set-up allowed only limited shooting in a single direction.
The new orchard set-up with the Idleback Chair allows me to cover more than one row.
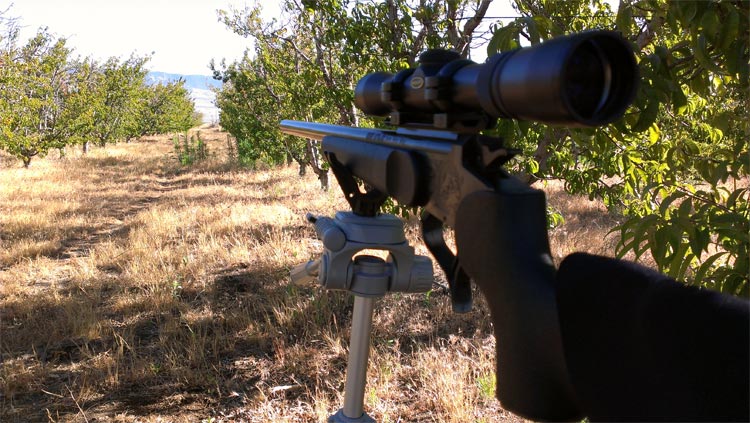
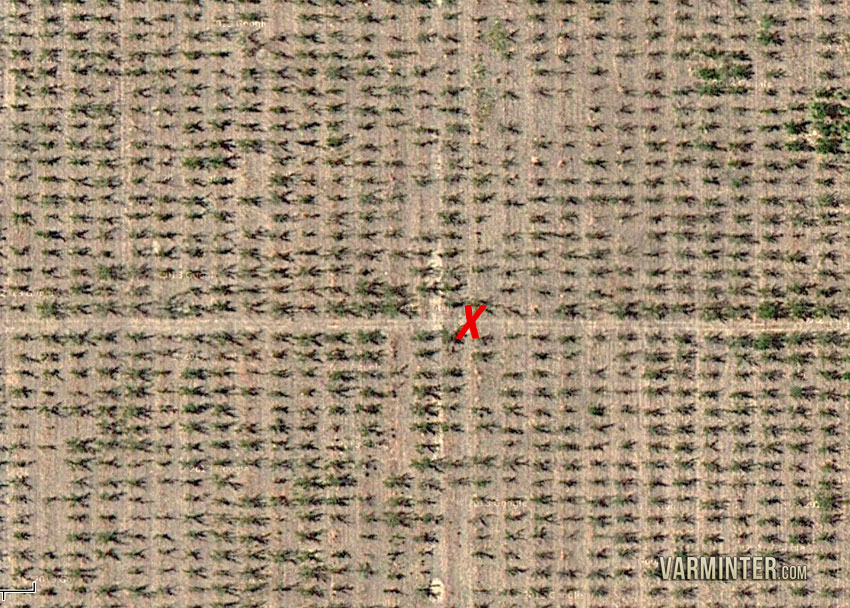
With the Idleback, I walked into the orchards, set up the chair and was able to cover more area than usual with little movement. I’m no longer stuck with just one row to hunt at a time. I now set-up at the intersection of the rows with a larger cut through the middle. If I pick the correct area, with sparse trees in the first 40 yards, the ability to move in almost every direction now allows me shots out to 250 yards. It is almost 360 degrees. I get into more detail in the included video below, including an actual hunt where I shoot a ground squirrel in the corner of a pistachio orchard. I have already seen an increase in the number of kills made in some of these orchards where my shots before this set-up were limited.
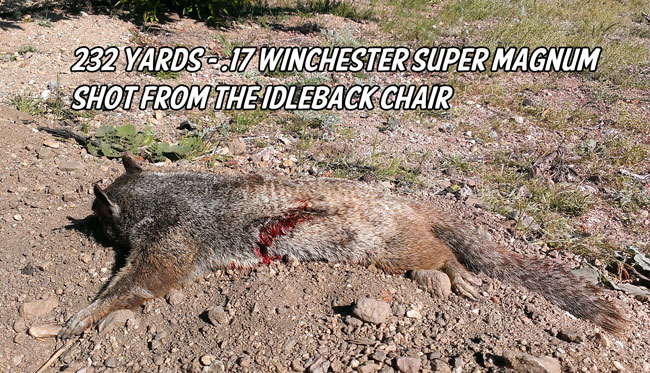
232 Yard Shot on a Ground Squirrel from the Idleback Chair
My final thoughts on the Idleback Shooting Chair:
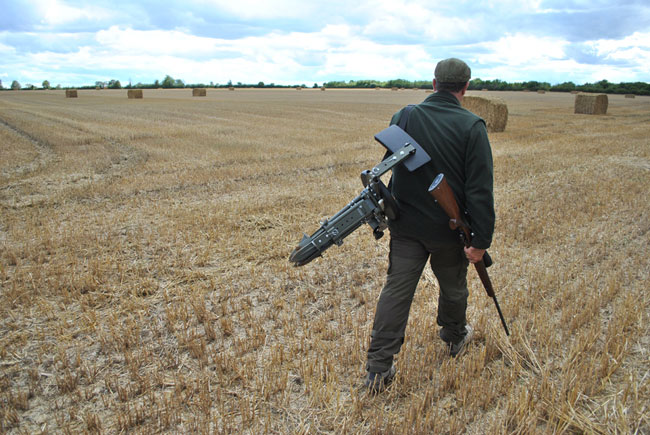
Idleback Shooting Chair – Light, Sturdy and Portable
I believe this chair is perfect for the type of hunting I do, at the ranges I hunt. My longest shot while using the Idleback was 232 yards (included in the video) while I was in one of the orchards that I hunt. It is very portable. Even with my smaller height (5’6″), it is easy to carry and weighs in a bit less than 22 pounds. It also sets-up and tears-down quickly and with no effort. The only issue I ran into when I first used the chair was that I did not plant the feet into the earth well enough to secure the chair while I was on some damp ground. This caused a bit more movement than normal when I was shooting with a heavier rifle. But it was quickly remedied when I pushed the feet deeper into the ground to make the base solid. Also, if you need extra stability for longer shots, I found that tilting the rear rest back a bit, creating a “V” with the rear rest and the front rest, made for a more stable shooting position. All in all, I think the folks at Idleback have a very well thought out idea that they have brought to fruition. If you look at one of these chairs up close, you will see the genius behind the knobs and extensions. It is something that I will continue to refer to as the “Swiss Army Knife” of shooting benches.
— Eric Mayer
Links from the Idleback Websites:
Assembly Instructions for Download
Many of the shots on my previous video from NE California are from the Idleback Shooting Chair and all of the shots included in the video below are from the Idleback Shooting Chair.
Idleback Shooting Chair Review with Hunt Clips Video:
- New Berger Bullets 6mm 120 Grain LRHT Bullet Announced - June 9, 2026
- New Lyman – Sonicore Suppressors from the 2026 SHOT Show - January 19, 2026
- A Unique Rifle – CZ Model 527 in .20 Hornet Ackley Improved - November 25, 2025


[…] into a bit more movement. Btw, there is a video embedded within the original article on my site: Idleback Shooting Chair Review with Hunt Clips that shows many of the shots on the Belding ground squirrels. I look forward to seeing the […]
[…] Shooting Chair: Two years ago, we completed an extensive review of the Idleback Shooting Chair. Our results showed that if you are a serious mobile varmint hunter, there is really nothing […]