![]()
___________________________________________________________________________
Poor Man’s Custom Rifle Part II
by: Tim Mancillas
So what does it take to rebarrel a Savage rifle? In my last article (written a few years back) I described the way to get a custom rifle on a working man’s pay check. Yes, I know the article was written some time ago, but hey, life has been busy!
At any rate I digress. So again, what does it take to rebarrel a Savage rifle? Not much. Some basic tools are required such as a barrel vise, a Savage barrel nut wrench (with driver), a BFW (that would be a really big Cresent wrench), a go-gauge (to set the headspace), some rosin and of course a barrel. In the illustration you will see, I am merely disassembling an existing Savage rifle (rebarreled in 6.5mm Swede) and reassembling it, but it should suffice for demonstration purposes.
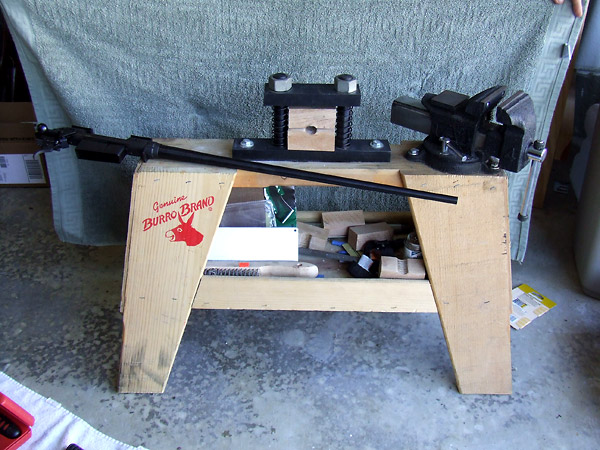
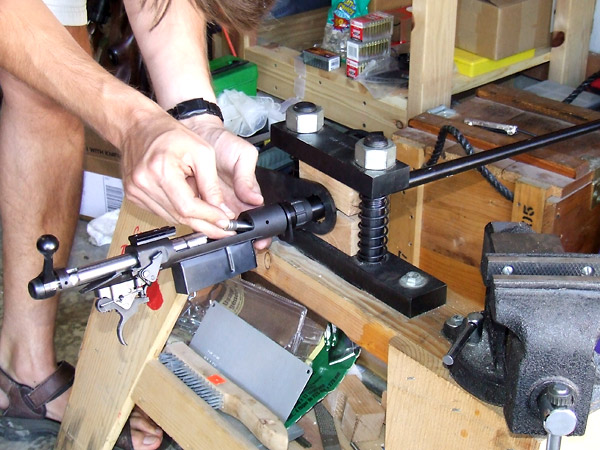
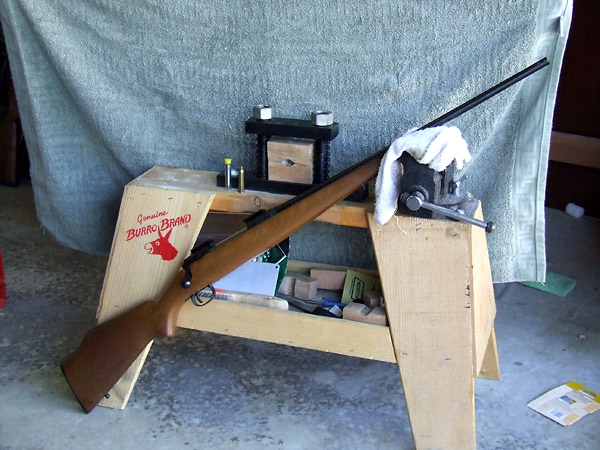
In the first illustration you’ll see my basic “shade tree” gunsmithing station with the action already pulled from the stock. I’d like to take credit for the idea of the saw horse, but actually I got it from one of the issues of the American Gunsmiths Association’s monthly journals. It has worked perfectly for all manner of gunsmithing jobs and I’d recommend it if you have any intent to perform any basic gunsmith work.
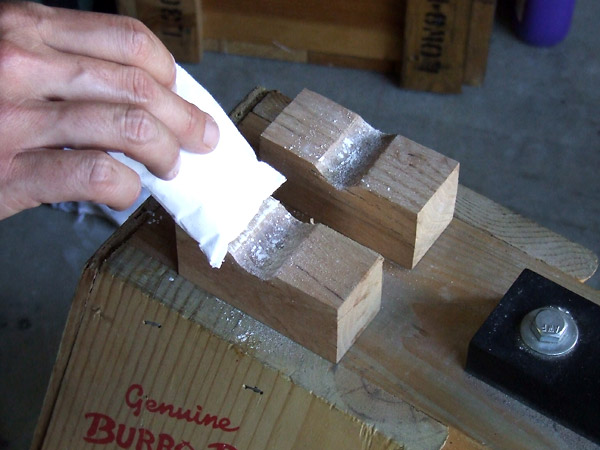
So as you can see, there’s not a whole lot to the rifle once it’s pulled from the stock. The first step will be to prepare the barrel vise blocks. This can be done by applying rosin to them. This is available at your local super Mart in the sporting goods section (just go to the baseball section and it’ll be somewhere around the bats). Simply dust the blocks with the rosin.
This will give a bit of a bite to the oak as the vise is cinched down on the barrel. Don’t worry about cracking the blocks because it will happen. Just insure that you are tightening both sides equally.
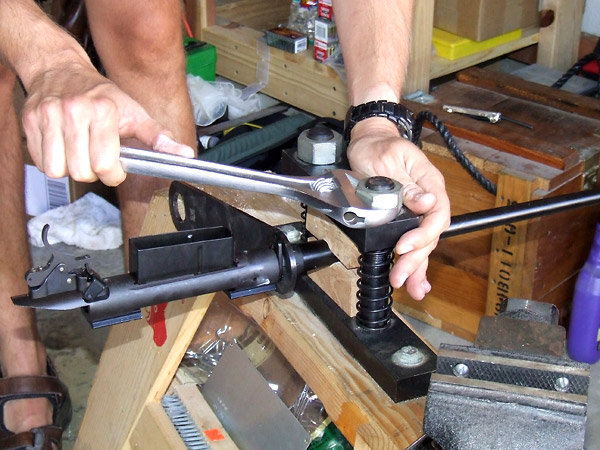
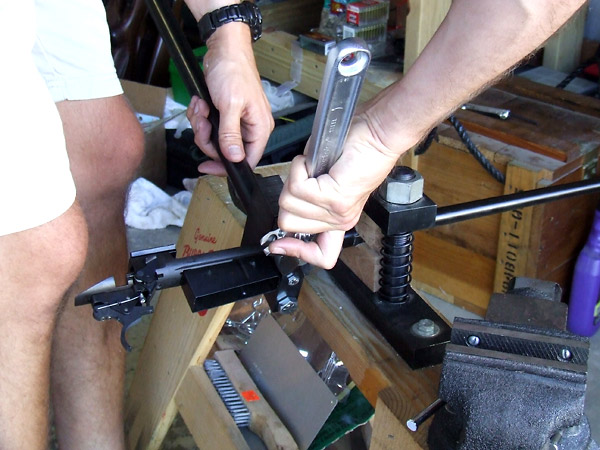
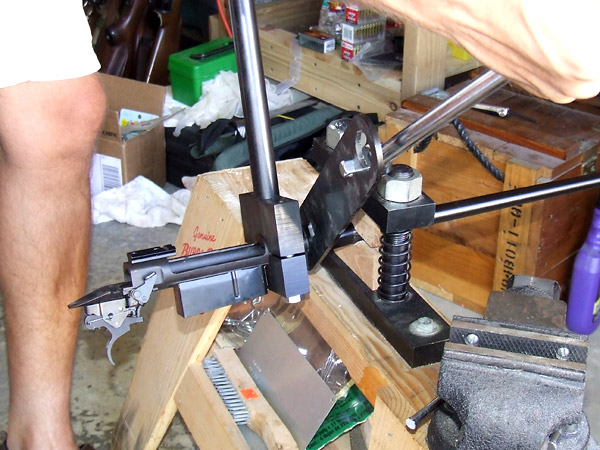
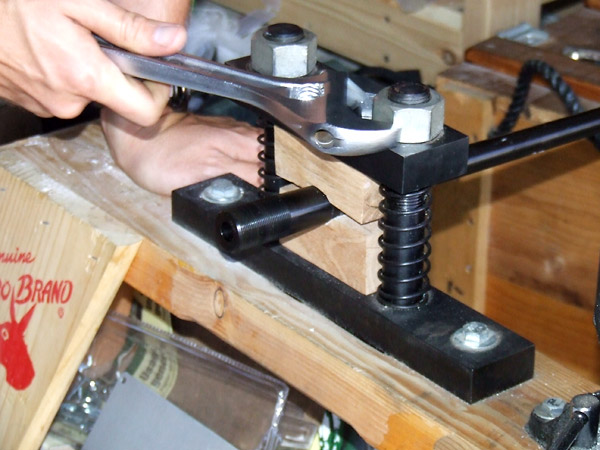
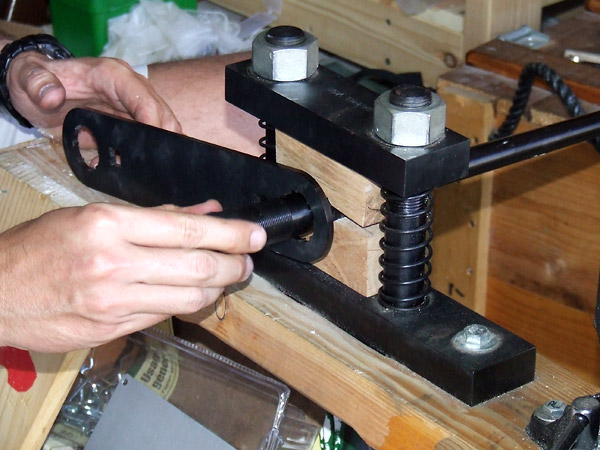
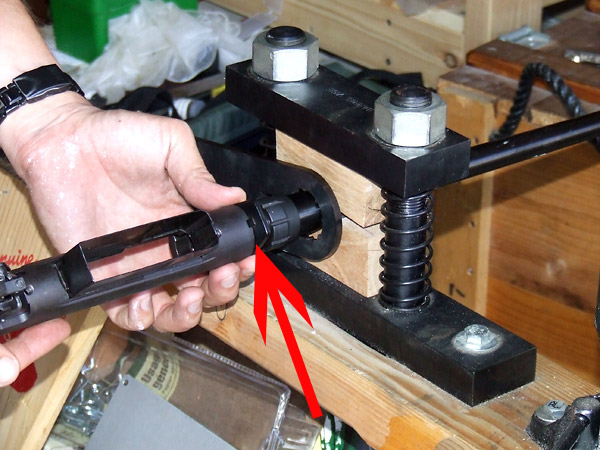
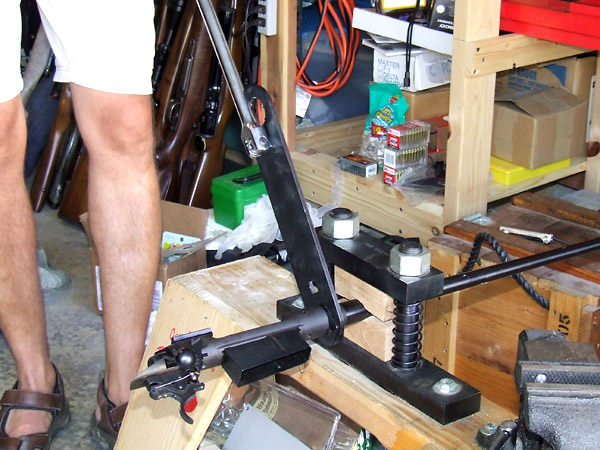
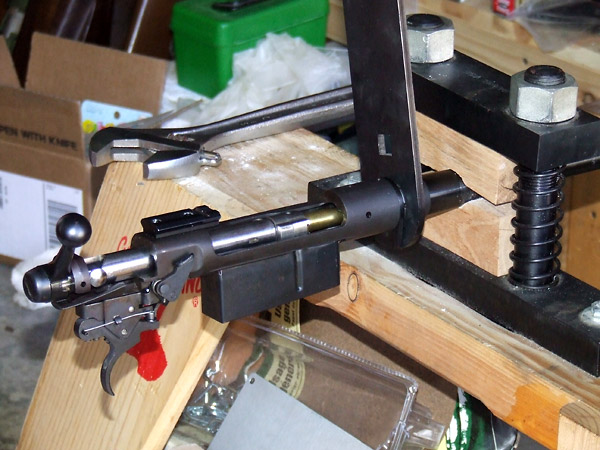
This vise is available from MidwayUSA for about $45 and is quite robust. The barrel nut wrench can be had from the same folks for about $40. You’ll note that the barrel nut wrench needs to be on the barrel nut before inserting the action into the vise (you don’t know how many times I’ve had to take everything apart because I forgot!). Once the barrel is cinched down, you can simply use a driver to turn/loosen the barrel nut. Now in some cases, Savage Firearms has their normal barreling guy out on Fridays, and they substitute it with a gorilla they hire form the local zoo. This can be determined when no amount of sweat, swearing or screaming will keep the barrel from turning in the vise as you try to loosen the barrel nut. Trust me on this one dear shooters. Once the barrel/action begins to turn, just stop. Loosen the vise, retighten and try again. Now on occasion I have had a barrel nut that would not budge for any amount of the aforementioned swearing and cursing. In this case you may require an additional tool…namely a Remington 700 round receiver, action wrench. These again are readily available and have come down quite a bit in price over the years (yea for CNC machining and mass production!). As shown in these illustrations, simply attach the action wrench (note that the forward scope mount will have to be removed)to the receiver via the forward action screw hole.


Once on and tight (not too tight!) simply use a scissor-like motion to loosen the barrel nut.
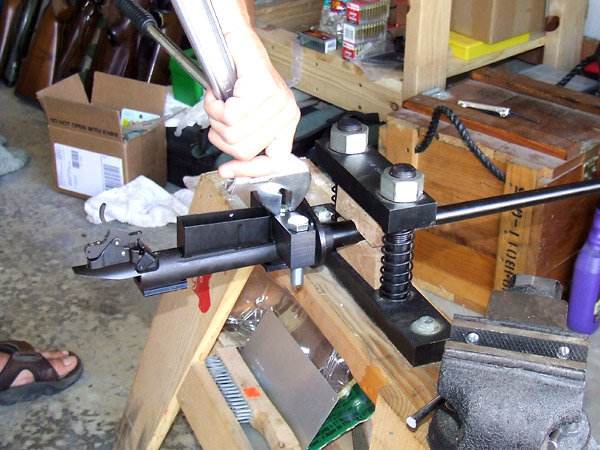
Poof! It should come off quite easily! If you intend to rebarrel a few Savage rifles, I’d highly recommend getting an action wrench. There’s nothing worse than not having the right tool for the job, and having all the parts for your rifle just taunting you from the workbench!
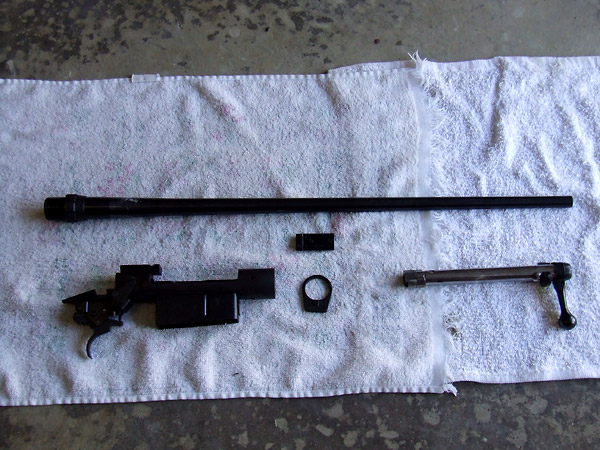
Once the barrel nut has been loosened its quite simple to completely disassemble the action to its various parts as shown here.
Now to put on the new barrel (and get to shooting your new cartridge!).
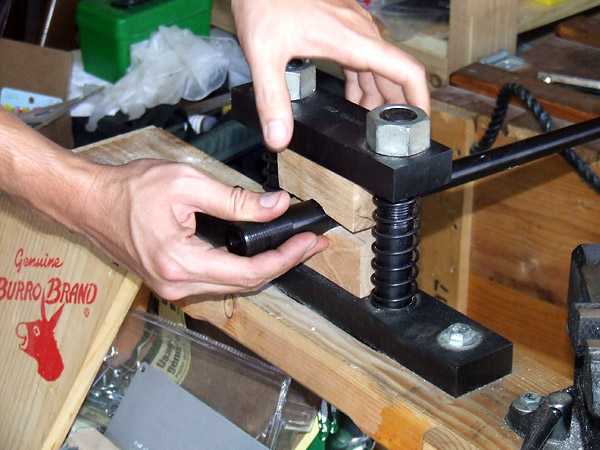
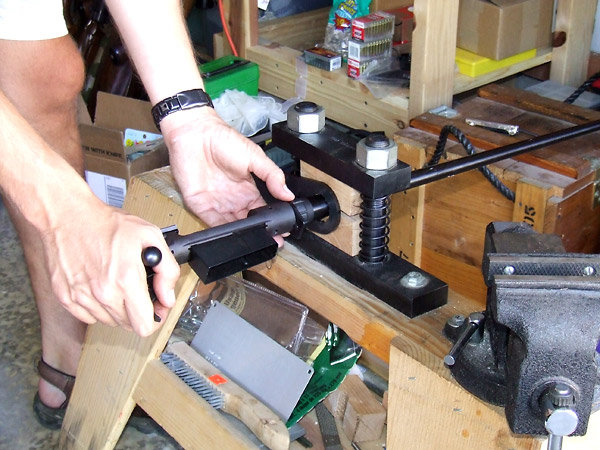
Just insert the new barrel into the vise and cinch it down.

Place the barrel nut wrench around the barrel shank and then thread on the barrel nut.
Once the barrel nut has been threaded on to the barrel shank completely (all the way forward until you run out of threads), place the recoil lug onto the shank and thread the action onto the barrel shank as well.
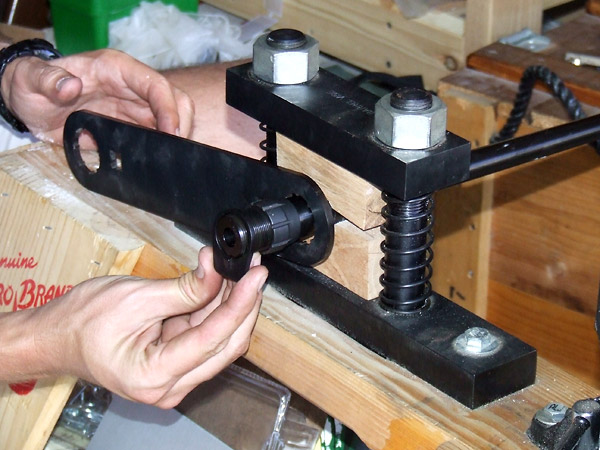
I would be remiss if I didn’t point out that there is a right and wrong way to put the recoil lug on. As seen here the recoil lug has a dimple.
The recoil lug should be placed onto the barrel with the dimple facing the action. On the action there is a cut out that marries up to the dimple.
Before threading the action all the way onto the barrel, place the bolt into the action and insert your “go” headspace gauge (specific to you barrel’s caliber) into the chamber and close the bolt over it.
With the bolt closed over the gauge, thread the receiver on to the barrel shank until it stops and tighten the barrel nut with your fingers up against the receiver face.
Okay shooters, you’re almost there! Now tighten the barrel nut with the barrel nut wrench snugly.
No gorilla force is needed!!! About 20 ft-lbs of torque is all that is needed! What you are trying to accomplish here is to create enough tension to cause the barrel nut to push the barrel away from the receiver and against the barrel shank threads (which, by the way, gives you optimum headspacing off of the minimum headspace of the go-gauge itself).
At this point it is always good to be safe. To insure that the headspace gauge was in place correctly (as the receiver was tightened down), remove the headspace gauge and insert an unfired piece of brass.
Simply close the bolt down and you should feel a slight amount of “crush” or tension as the cartridge’s shoulder is forced up against the chamber. Remove the brass and inspect that the neck and/or shoulder of the cartridge for marks that are the tell-tale signs of proper headspacing.
Voila!
You have just rebarreled your very own rifle! And with optimum headspace to boot! Not too painful you say? I should think not! This very barreling process has been the genius behind the design of the Savage bolt action rifle. While asthectically unappealing the barrel nut may be, this is how Savage Arms has been able to produce an inherently accurate rifle for a price that every person can afford.
In closing, I hope that this illustrated set of instructions have provided you with the information you need to build you own custom rifle. I’d highly recommend it, if for no other reason than becoming more familiar with your rifle. Hopefully, in the not too distant future, I’ll finish the third (and final) article to this topic.
A custom paint job!
Tim Mancillas
Editor's note:
Warning: Since the initial publication of the first article in this series, Savage has changed barrel dimension specs. Ensure that you have the appropriate barrel thread pitch and diameter to match your receiver! This is determined by the rear top of the receiver (flat or round). The barrel nut dimensions remain unchanged.
Tim Mancillas is a Technical/Guns Editor for Varminter.com Online Magazine.
Photography by: Tyler Tatsch
©1999-2010 Varminter.com Online Magazine